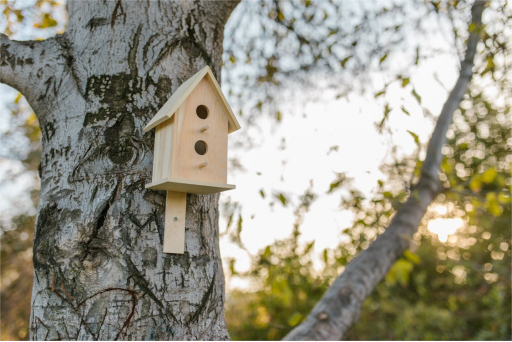
Family time: How to make a birdhouse together using a chainsaw
Building a birdhouse with children can teach them about nature and wildlife. Using a Livowalny chainsaw can be an exciting way to engage kids in woodworking. Below are step-by-step instructions on how to build a simple birdhouse using a chainsaw, as well as enjoyable experience for everyone involved.
Materials Needed
Wood: Choose untreated pine or cedar (1" x 6" boards are a good option)
Screws or nails: For assembling the birdhouse
Wood glue: Optional for added stability
Wood stain or paint: For finishing (optional)
Roofing material: Such as shingles or sheet metal (optional)
Tools Needed
Chainsaw: For cutting the wood pieces (ensure an adult operates this)
Power drill: For drilling holes and screwing pieces together
Sander: To smooth rough edges (or sandpaper)
Tape measure: For accurate measurements
Safety gear: Goggles, gloves, and ear protection
How to use a chainsaw Building a birdhouse with kids.
Step-by-Step Instructions
- Plan the Birdhouse Design
Decide on the design of the birdhouse. A simple design includes a front, back, two sides, a bottom, and a roof. A standard birdhouse size is about 8 inches wide, 8 inches deep, and 10-12 inches tall. The entrance hole should be about 1.5 inches in diameter for common birds like bluebirds or wrens.
- Cut the Woodwith Livowalny chainsaw
Measure and mark the dimensions for each piece of wood according to your design. Encourage the children to help with measuring and marking, as this teaches them valuable skills. Ensure children are at a safe distance while you use the chainsaw. Explain the importance of safety precautions.
Use the chainsaw to cut the wood according to the measurements:
Front and back panels: 10" x 8" (cut at an angle for the roof, if desired)
Side panels: 10" x 8" (cut the same angle as the front and back)
Bottom panel: 8" x 8"
Roof panels: Two pieces (each 10" x 8" for a slanted roof)
- Drill the Entrance Hole
Use a power drill with a hole saw attachment to create an entrance hole in the front panel of the birdhouse. Ensure it’s about 1.5 inches in diameter and centered a few inches from the bottom.
- Assemble the Birdhouse
Start by attaching the bottom panel to the side panels using wood screws or nails. Pre-drill holes to prevent the wood from splitting, especially when working with kids. Attach the front panel next, ensuring the entrance hole is at the right height. Finally, attach the back panel, securing all pieces tightly. Add the roof pieces last, ensuring they overhang to protect the entrance from rain.
- Sand and Finish the Birdhouse
Sand down any rough edges to prevent splinters, making it safe for children to handle. Optionally, paint or stain the birdhouse to protect it from the elements and decorate it. Make sure to use non-toxic products if children will be involved.
- Add Drainage and Ventilation Holes
Drill small holes in the bottom for drainage and a couple of holes near the top for ventilation. This helps keep the interior comfortable for the birds.
- Hang or Mount the Birdhouse
Find a suitable location to hang or mount the birdhouse, ideally at least 5-10 feet off the ground and away from predators. Use a sturdy hook or nails to secure it in place.
Making a birdhouse with children using Livowalny chainsaw is more than just a fun DIY project; it serves as a multi-faceted learning experience that promotes creativity, practical skills, teamwork, and environmental stewardship. Do it now!


